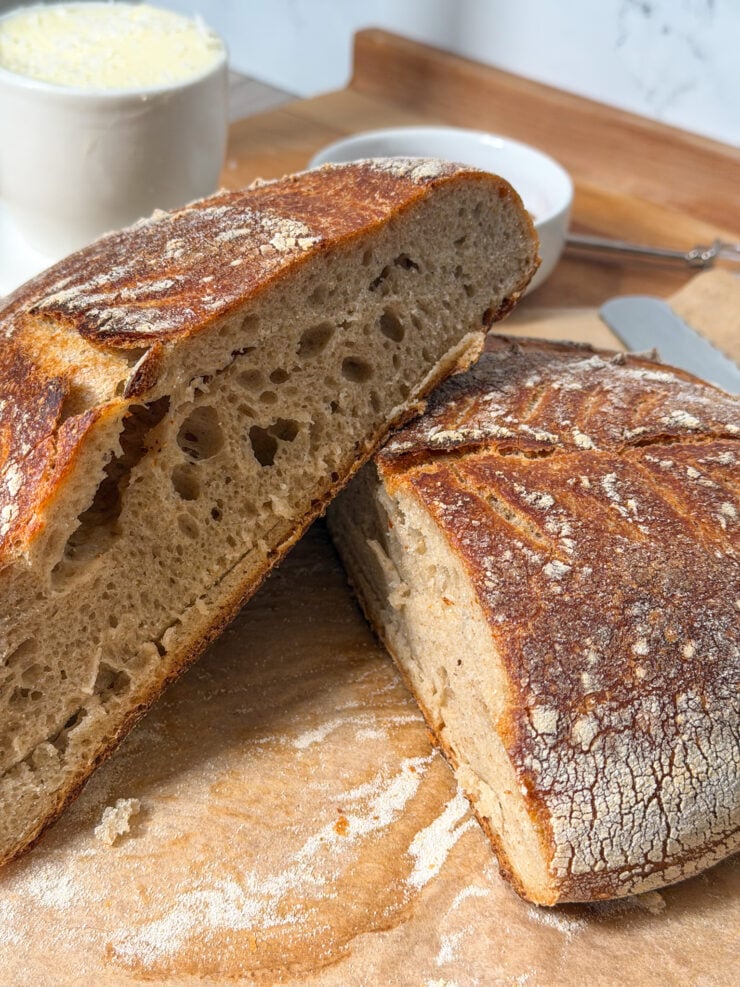
This amazing sourdough bread is designed for real life and real kitchens, blending a teacher’s love of structure with a home cook’s intuitive touch. Naturally leavened with an active starter and lightly sweetened with local honey, this loaf bakes up with a crisp, crackly crust and a soft, chewy interior full of flavor. The step-by-step directions break the process into manageable, confidence-building stages, making sourdough feel approachable whether this is your very first loaf or one of many. Thoughtful, precise, and deeply rewarding, this recipe is meant to guide you from starter to slice with clarity—and a little joy along the way.
This post marks a new chapter on my little corner of the internet—one that feels equal parts grounding, challenging, and joyful. I’m a mom, a teacher by trade, and a cook at heart. For years, my cooking style has leaned on intuition: a pinch of this, a splash of that, measuring mostly with my heart. Sourdough bread, however, has invited me into a different rhythm—one rooted in precision, patience, and problem-solving. And surprisingly, I love it.
As a teacher, I spend my days thinking, planning, and adapting. Sourdough has become a creative outlet that uses my brain in a new way while still feeding my family in the most literal sense. I’m so excited to start sharing sourdough recipes here—recipes that feel approachable, thoughtful, and deeply nourishing—and to help bring this beautiful craft into other homes.
Let’s get started.
what is sourdough bread?
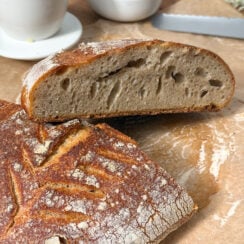
Sourdough bread is a naturally leavened bread made without commercial yeast. Instead, it relies on a living culture of wild yeast and beneficial bacteria to rise.
This natural fermentation process gives sourdough its signature flavor, chewy texture, and crisp crust, while also making it easier to digest than many conventional breads.
what is sourdough starter?
A sourdough starter is a simple mixture of flour and water that has been fermented over time. This takes patience; you don’t want to rush this process. A strong starter is key to a great sourdough bread. It captures wild yeast and lactic acid bacteria from the environment.
When active and healthy, a starter acts as the leavening agent for sourdough bread, providing lift, flavor, and structure.

how to feed sourdough starter
Feeding a starter means discarding a portion and refreshing it with fresh flour and water.
- Discard all but a small amount of starter
- Add equal weights of flour and water – I rotate between 1 cup whole wheat flour and 1 cup warm water and then 1 cup bread flour and 1 cup warm water for this.
- Stir until smooth
- Cover loosely and let ferment at room temperature

If stored in the refrigerator, a starter typically needs feeding every one to two weeks. Therefore, when baking regularly, daily or twice-daily feedings help keep it strong.
when is my starter ready for use?
Your starter is ready when it:
- Doubles or triples in volume within 4–8 hours of feeding
- Has bubbles throughout and a slightly domed surface
- Smells pleasantly tangy, not sharp or sour
A simple rubber band around the jar makes it easy to track growth.

equipment
You don’t need a lot of tools to make great sourdough, but these help:
- Digital kitchen scale – I highly recommend this for complete precision.
- Large mixing bowl
- Straight-sided container for bulk fermentation
- Bench scraper
- Clean kitchen towels
- Parchment paper
- Banneton or bowl lined with a towel
- Sharp blade or lame for scoring
- Dutch oven with lid

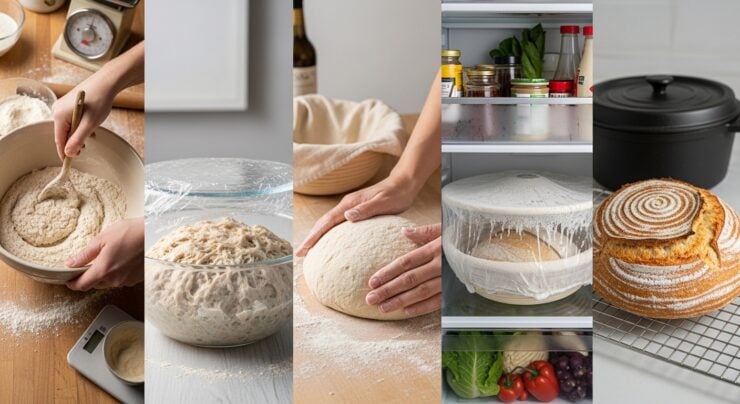
the core process in making sourdough bread
At its core, sourdough bread follows a predictable flow:
- Mix the dough
- Bulk ferment with gentle strength-building
- Shape and rest
- Cold proof
- Score and bake
Understanding this rhythm makes the process feel manageable, even on busy teaching-and-momming days.
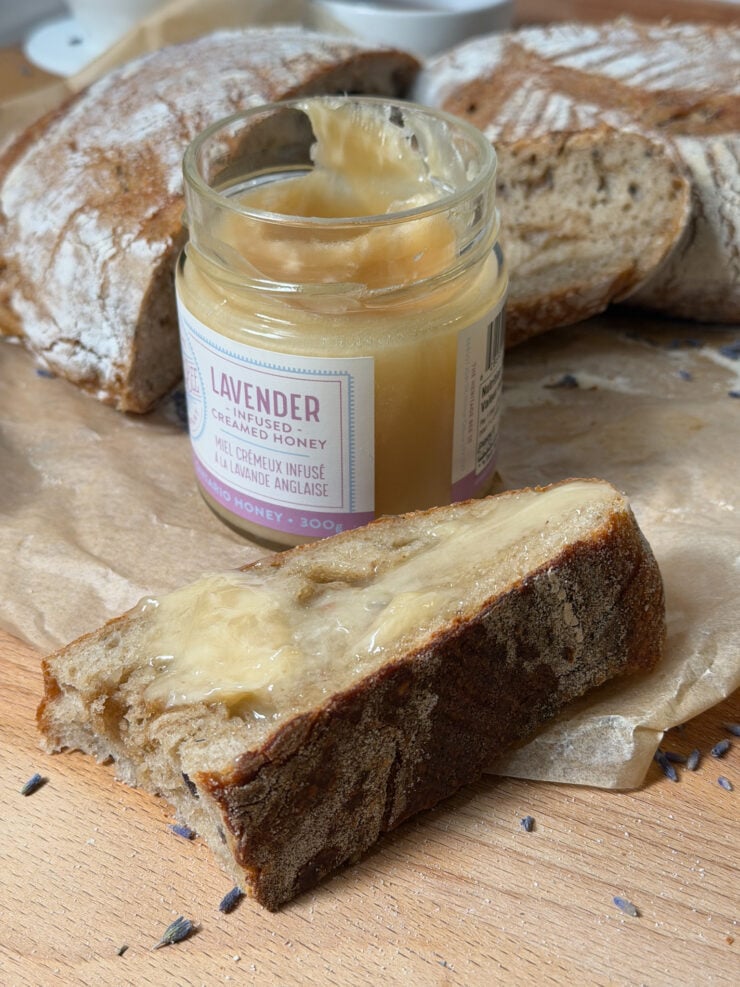
why this sourdough bread recipe uses honey
This recipe includes a small amount of local honey, which:
- Gently feeds the yeast without overpowering the dough
- Adds subtle flavor and color to the crust
- Reflects my love of using local, thoughtful ingredients
The honey doesn’t make the bread sweet—it simply supports fermentation and balance.
simple sourdough bread: a step-by-step guide
ingredients
All measurements are approximate equivalents.
- Active sourdough starter
- 100 grams (⅓ cup)
- Warm water
- 375 grams (1½ cups + 1 tablespoon)
- (Local) honey
- 20 grams (1 tablespoon)
- Whole wheat flour
- 60 grams (½ cup)
- Bread flour
- 440 grams (3½ cups)
- Salt
- 10 grams (½ tablespoon)

how-to-make sourdough bread method
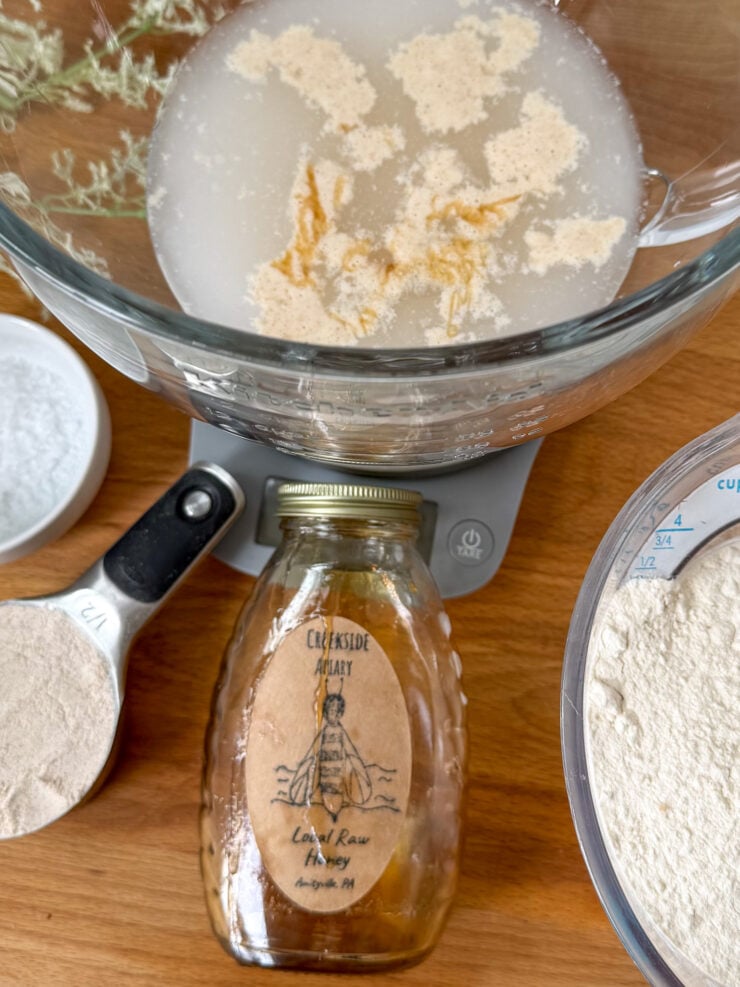
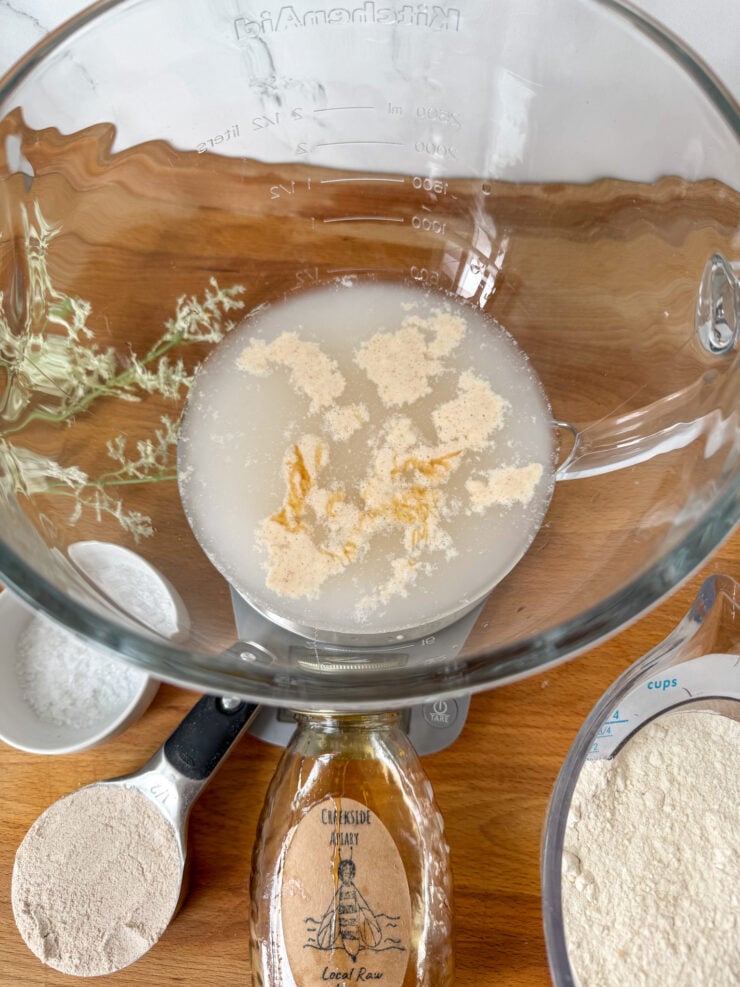
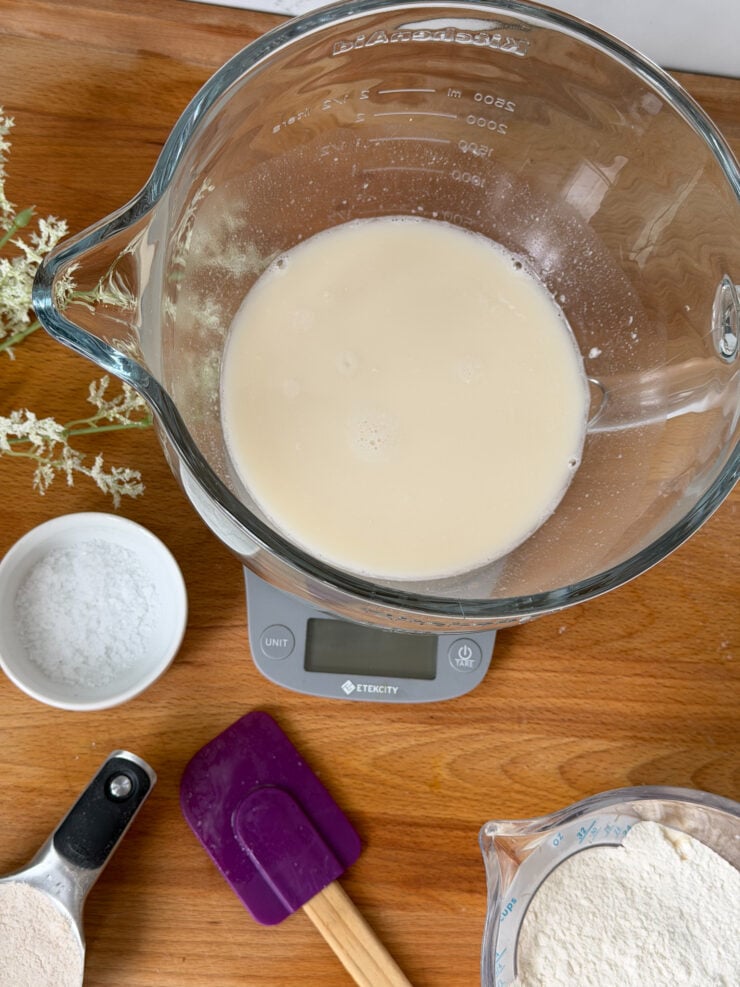
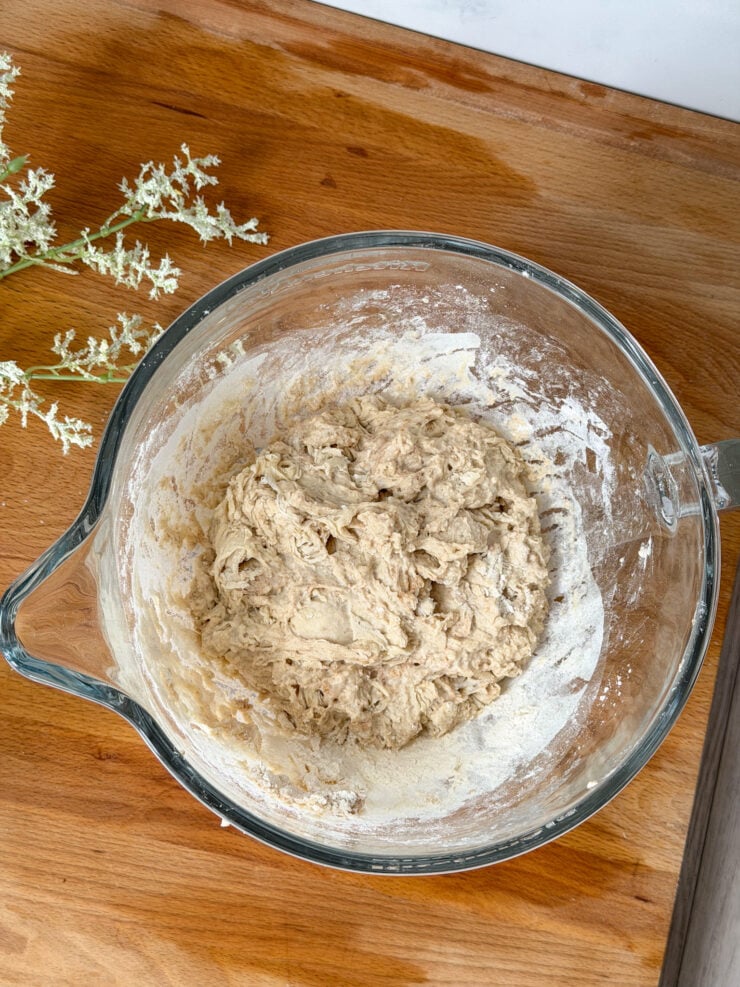
- Mix warm water, starter, and honey


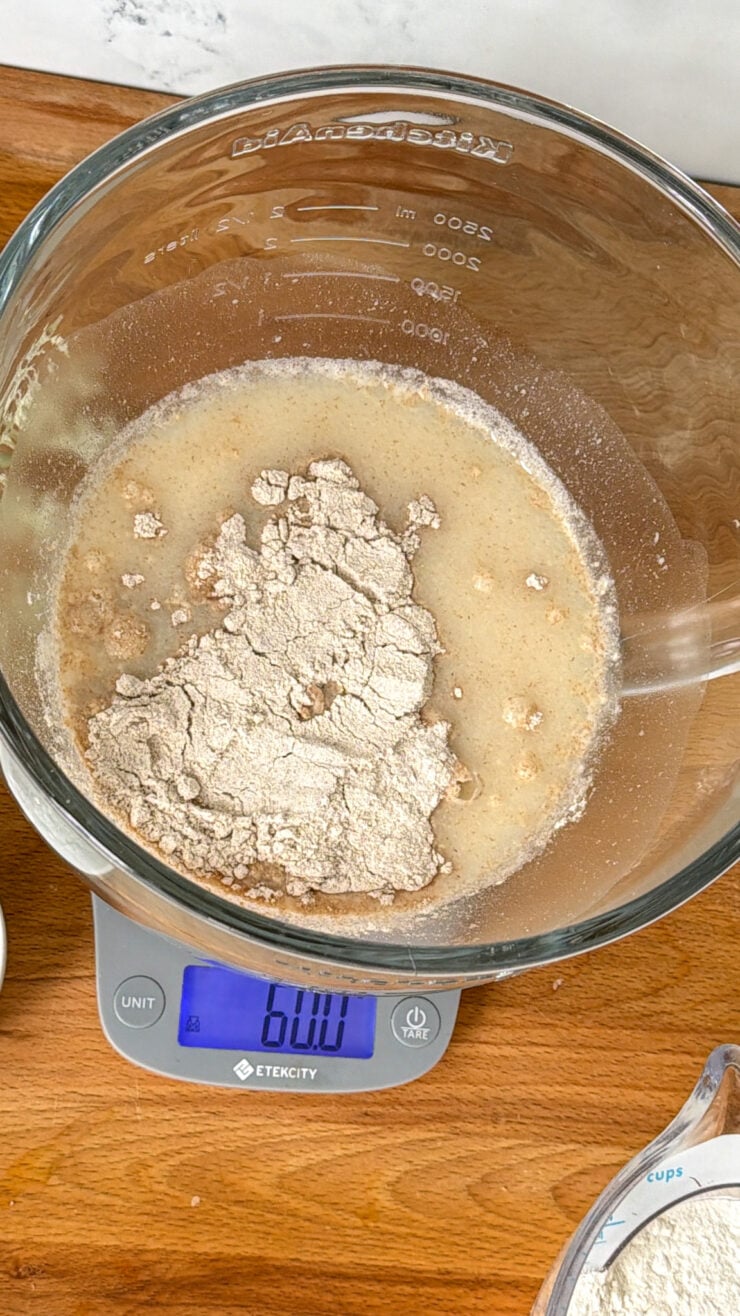
- Add flours and salt, stirring until combined into a shaggy mass.

- Rest and perform gentle stretch-and-folds
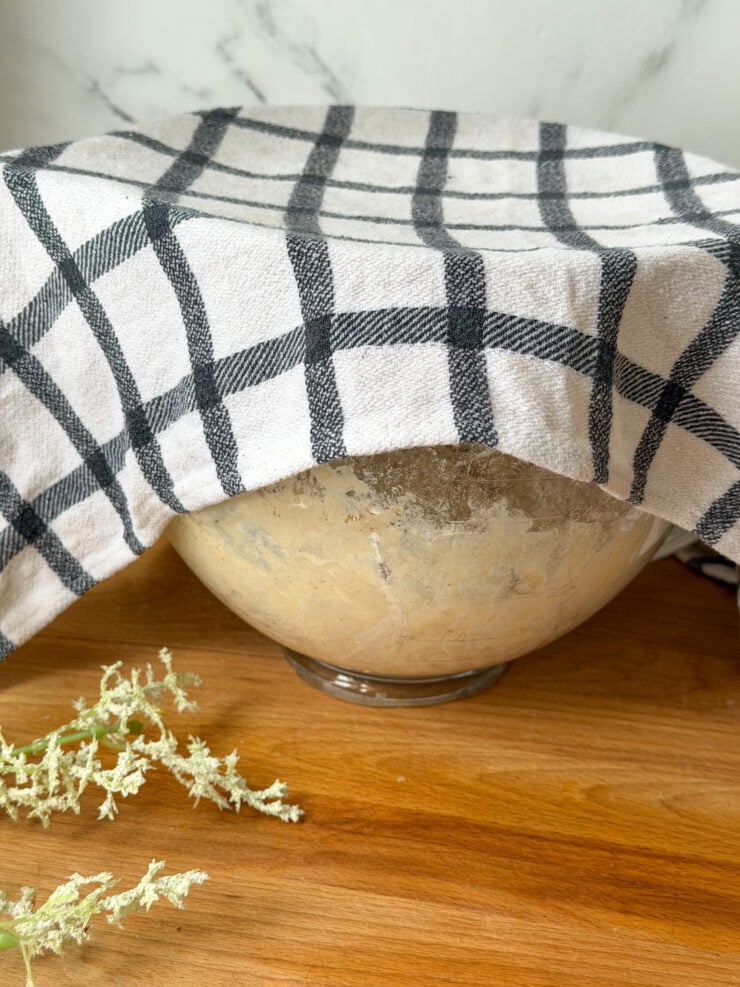

- Bulk ferment until dough rises about 50%

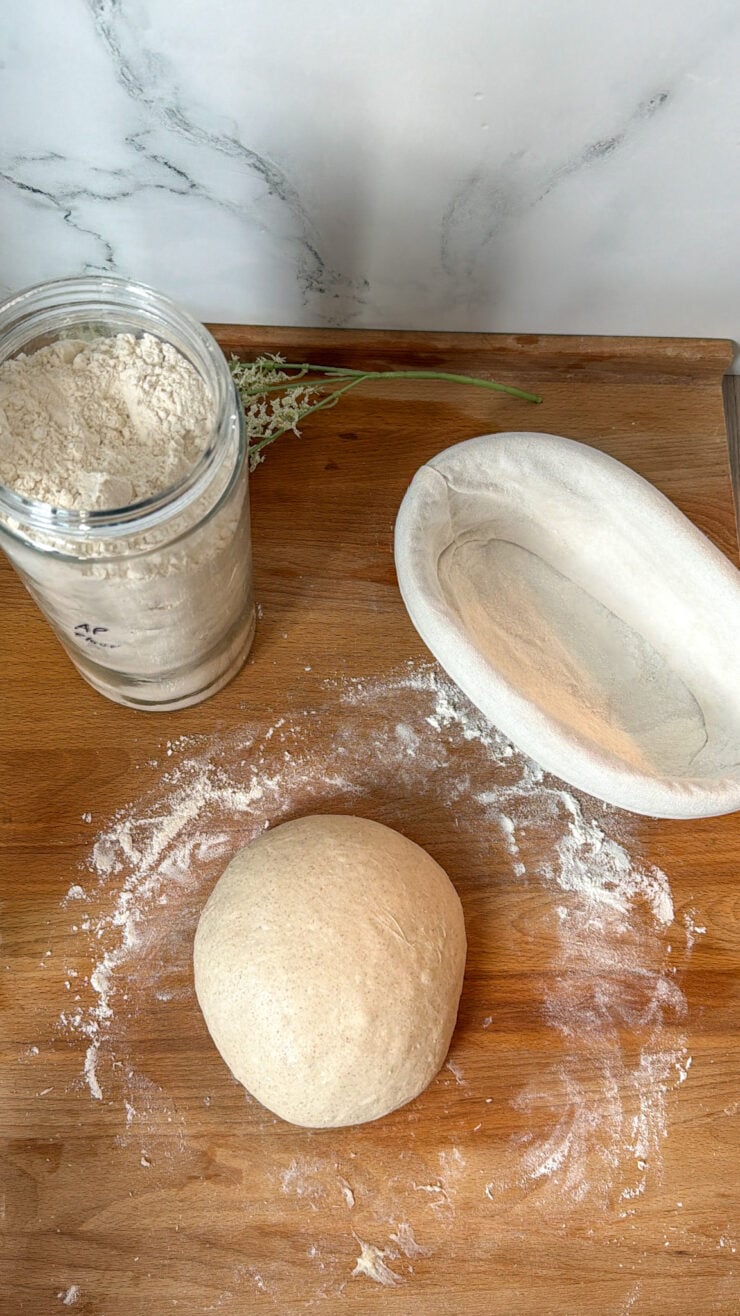
- Shape, rest, then cold proof

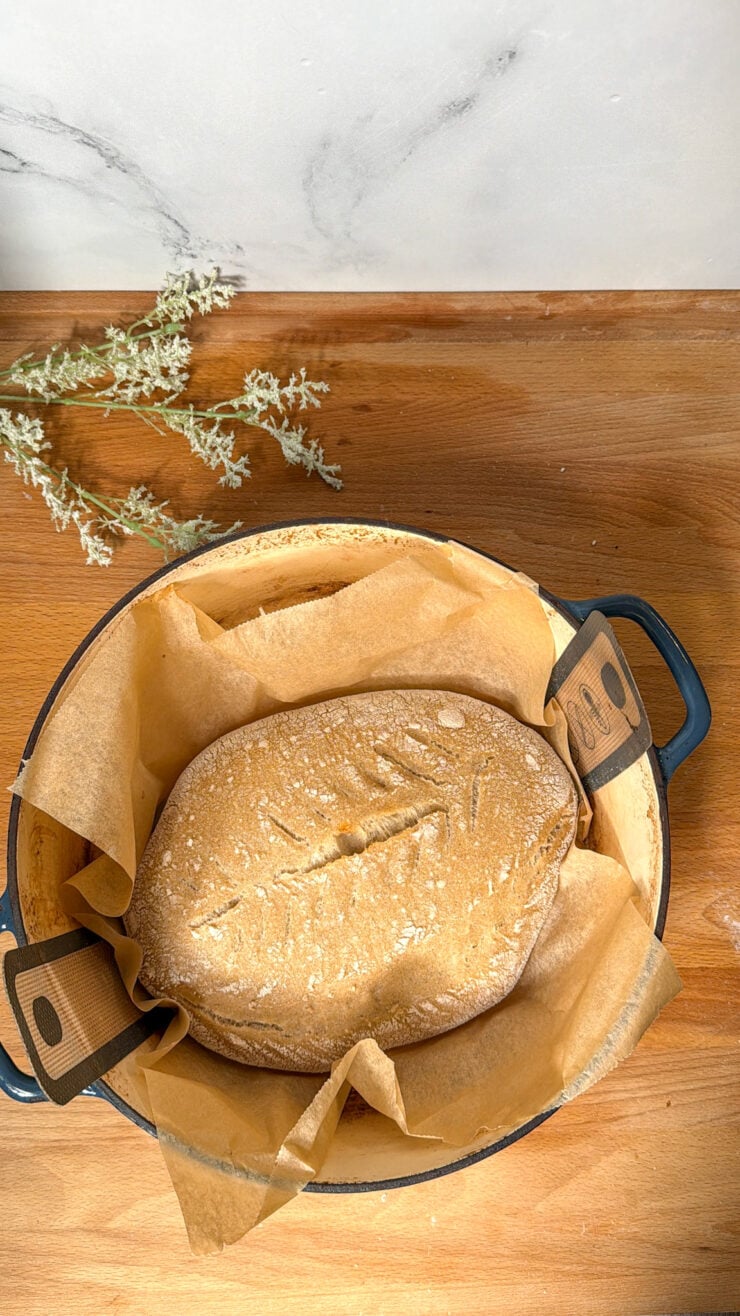
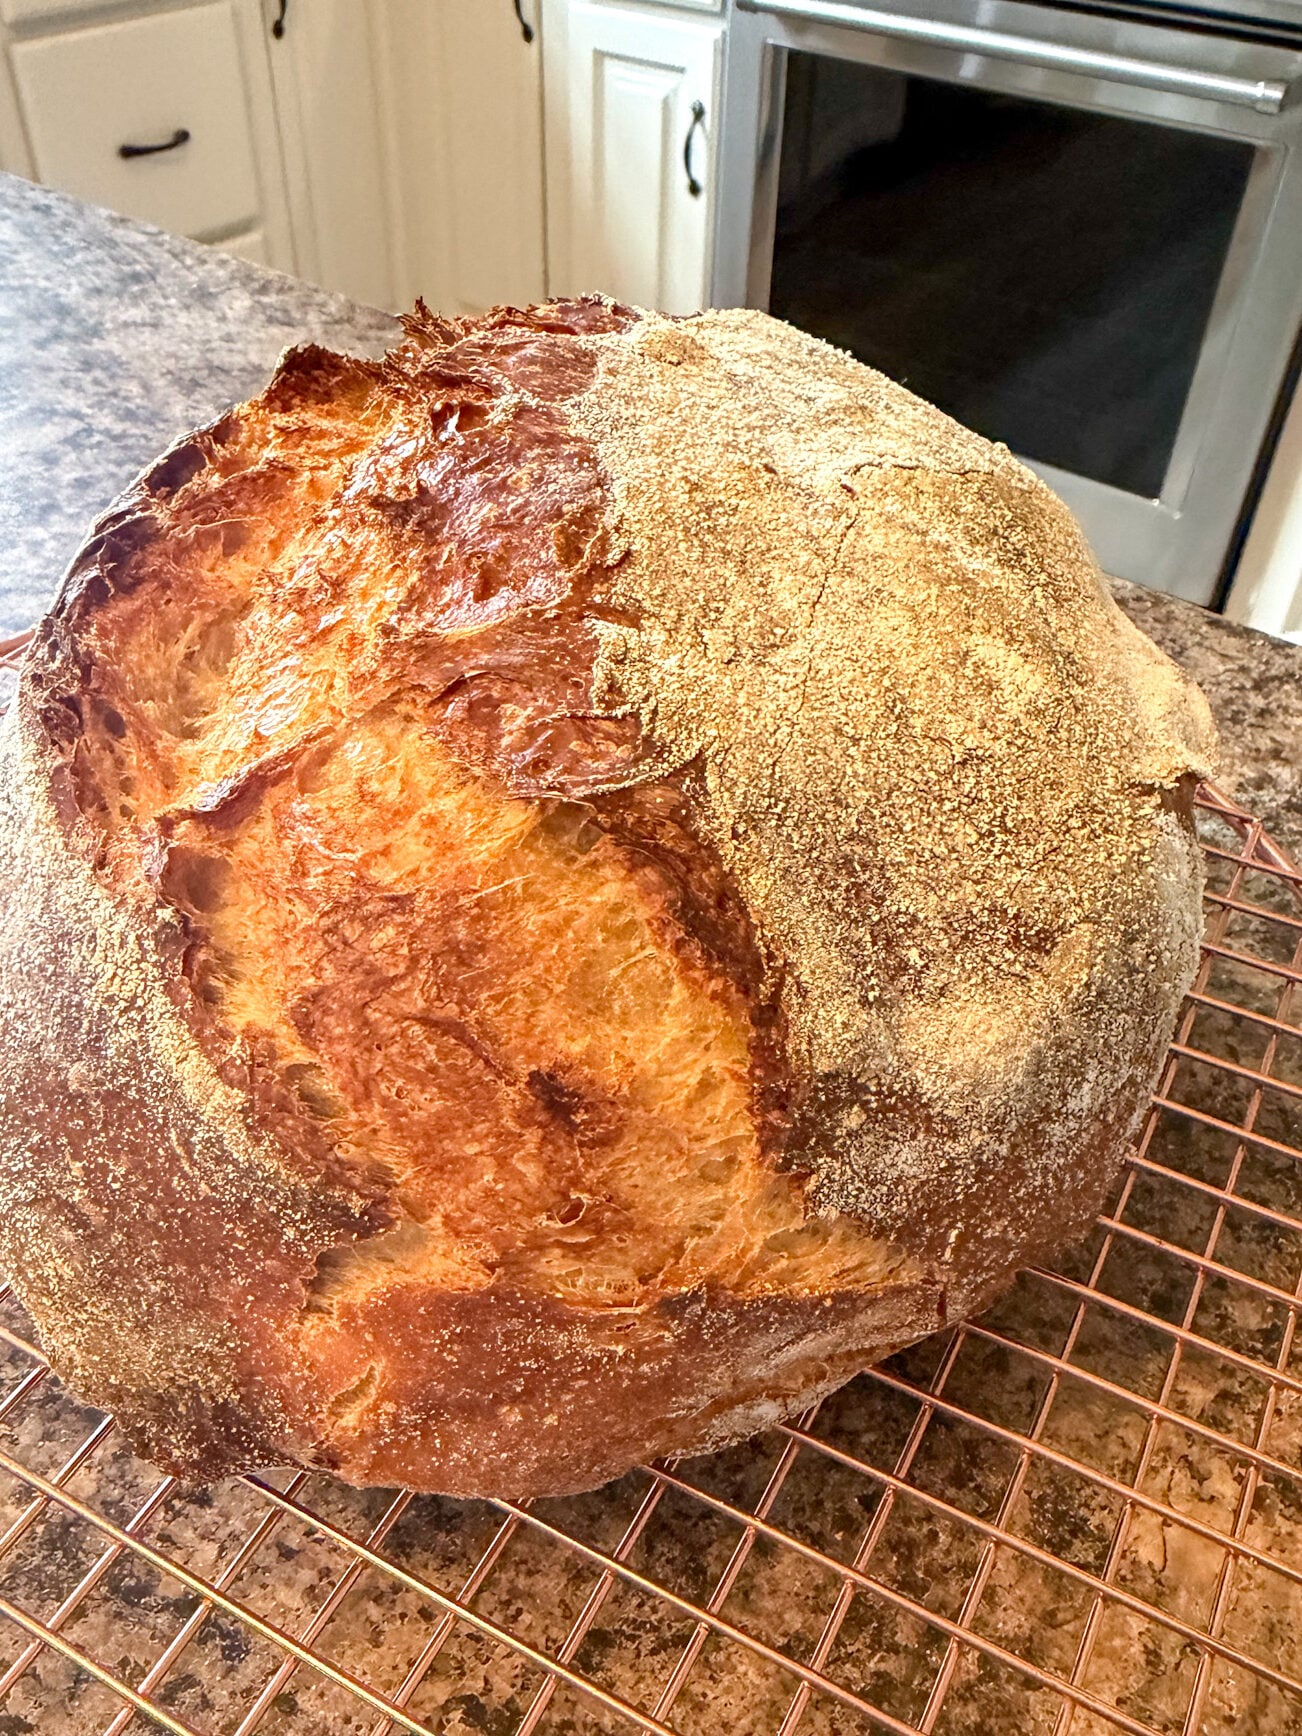
- Bake in a hot Dutch oven until deeply golden


#1 sourdough bread baking tip
Use your refrigerator strategically.
Cold temperatures slow fermentation, giving you flexibility. If life gets busy—late grading, evening activities, or just needing rest—refrigeration keeps your dough from over-proofing.
troubleshooting: where sourdough bread goes wrong
Most sourdough issues trace back to a few common causes:
- Starter not active or used too early or too late
- Too much water for the flour type
- Over-fermentation during bulk rise
- Too high a percentage of whole grain flour
Adjusting just one variable often solves the problem.
sourdough bread baking resources
Resources I lean on and recommend:
- Starter maintenance guides
- Dough hydration charts
- Visual fermentation cues
- Baking vessel comparisons
- Crumb and crust troubleshooting references

Learning sourdough is part reading, part observing, and most importantly part experimenting.
other sourdough bread recipes to make
Once comfortable with a basic loaf, try:
- Whole wheat sourdough
- Sourdough focaccia
- Sourdough sandwich bread
- Sourdough pizza dough
- Sourdough discard crackers or tortillas
Each variation teaches you something new.
And we are just getting started…
Sourdough Bread Baking Schedule
A realistic, family-friendly rhythm:
- Evening Day 1: Feed starter
- Morning Day 2: Feed starter again
- Afternoon Day 2: Mix dough and begin bulk fermentation
- Evening Day 2: Shape and refrigerate
- Day 3: Bake straight from the fridge
This schedule fits around school days, homework, and real life.

Sourdough has become more than just bread in our home—in all honesty, it’s a practice, a pause, and a creative outlet that balances heart and mind. I’m beyond excited to keep sharing this journey, one loaf at a time, and to help bring the joy of sourdough baking into your kitchen, too.
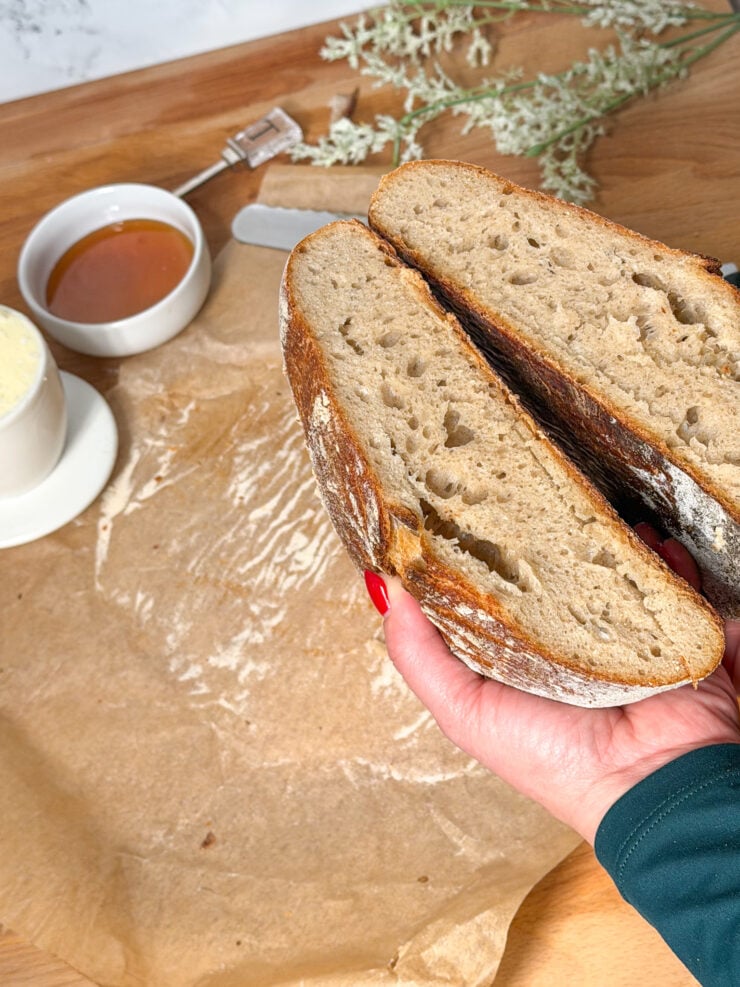
I hope you enjoy this recipe as much as we do. It’s definitely one of those recipes worth saving. There’s nothing better than having a freshly homemade sourdough bread loaf on the table.
Please leave us a star review and comment if you make this amazing sourdough bread recipe with honey.
If you have any questions or comments, feel free leave them below. I answer every single question as quickly as I can.
Happy baking! And thanks for being part of our tribe, The Tasteful Tribe!
ENJOY!
If you love this recipe, check out…
- The Easiest Peach Dumplings Recipe (Made with Crescent Rolls!)
- Easy Cranberry Orange Cream Dumplings (Perfect for Christmas!)
- Simple Sour Cream Apple Pie (Traditional Pennsylvania Dutch Recipe)
Amazing Sourdough Bread (With Step by Step Directions)
- DFDairy-Free
- SFSugar Free
- VGVegetarian
Ingredients
- 100 g (⅓ cup) bubbly, active starter
- 375 g (1½ cups + 1 tbsp) warm water , (about 80°F / 27°C)
- 20 g (1 tbsp) honey
- 60 g (½ cup) whole wheat flour
- 440 g (3½ cups) bread flour
- 10 g (1½ tsp) fine sea salt
Instructions
1. Make the Dough
In a large mixing bowl, whisk together the starter, warm water, and honey until the starter dissolves. Add both flours and the salt. Mix with your hands or a sturdy spoon until no dry bits remain. The dough will be sticky and rough, and look like a shaggy mass. Cover the bowl with a damp towel and let rest for 30 minutes.2. Stretch and Fold
With damp hands, grab one side of the dough, stretch it upward, and fold it over itself. Rotate the bowl a quarter turn and repeat until you’ve stretched and folded all four sides. Cover and rest for 30 minutes. Repeat this process 3–4 times over the next 2 hours. Each set strengthens the dough and builds structure.3. Bulk Fermentation (First Rise)
After the final fold, cover the bowl and let the dough rise at room temperature (75–78°F) until it looks puffy and has increased by about 50% in volume—typically 4–6 hours, depending on temperature and starter strength.4. Shape
Lightly flour your work surface and gently turn out the dough. Using your hands or a bench scraper, shape the dough into a round by folding the edges toward the center. Flip it seam-side down and use your hands to gently tighten the shape by dragging it toward you.5. Rest
Let the shaped dough rest seam side up for 30 minutes to relax the gluten. If the surface flattens or spreads, gently tighten the shape again.6. Proof (Second Rise)
Place the shaped dough seam-side up in a rice floured banneton or a bowl lined with a floured towel. Cover and refrigerate for 8–12 hours (overnight). This slow, cold proof develops flavor and makes scoring easier.7. Preheat Oven with Dutch Oven
Place a Dutch oven (with lid) inside your oven and preheat to 475°F (245°C) for at least 30 minutes.When ready to bake, remove the dough from the fridge. It should feel firm and slightly domed.8. Score
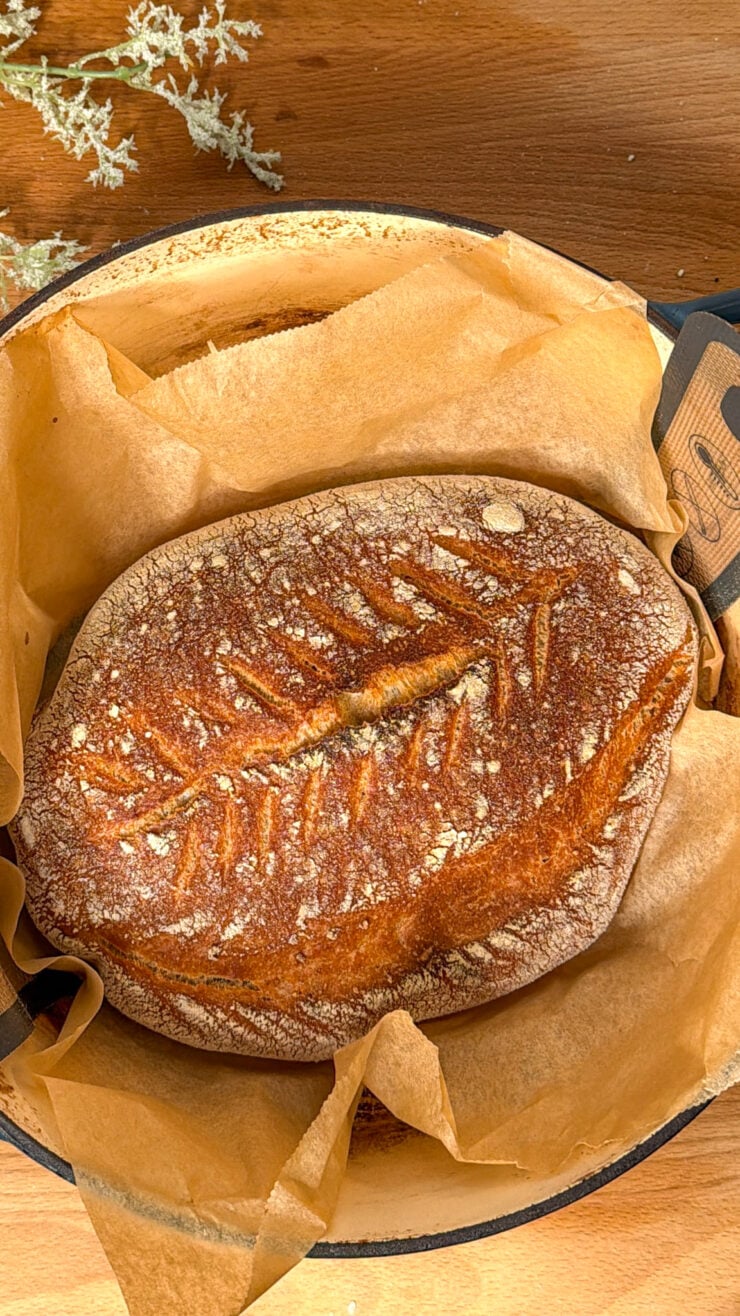
Invert the dough onto a piece of parchment paper. Using a sharp blade or lame, score the top with a single deep slash (about ½ inch) or a decorative pattern to allow steam to escape and the loaf to expand.9. Bake
Carefully transfer the dough (on the parchment) into the preheated Dutch oven. Cover and bake for 25 minutes.Remove the lid and continue baking for another 20–25 minutes, until the crust is deep golden brown and crisp.Transfer the loaf to a wire rack and let it cool completely—at least 1 hour—before slicing.10. Enjoy / Store
Slice and enjoy fresh, or store at room temperature wrapped in a towel or paper bag for up to 3 days. For longer storage, slice and freeze in an airtight bag.
Equipment
- dutch oven
Notes
- Starter Activity: Your starter should be bubbly, doubled in size, and pass the float test before mixing.
- Fermentation Time: Warmer kitchens shorten rise times; cooler ones lengthen them.
- Honey: Local honey adds subtle sweetness and enhances crust color.
- Flour Options: You can replace the whole wheat flour with more bread flour for a lighter crumb or increase it for a heartier loaf.
- Dutch Oven Tip: If you don’t have one, bake on a preheated baking stone with a pan of hot water on the lower rack to create steam.
🧭 Sample Baking Schedule
| Time | Step |
|---|---|
| 8:00 PM | Feed starter |
| 7:00 AM | Mix dough |
| 7:30–9:30 AM | Stretch and fold |
| 9:30 AM–1:30 PM | Bulk fermentation |
| 1:30 PM | Shape and rest |
| 2:00 PM | Refrigerate for proof |
| Next morning | Preheat oven and bake |
Nutrition
Did you make this recipe? Don’t forget to tag thetastefultribe on instagram @thetastefultribe if you try this amazing sourdough bread (with steps by step instructions) recipe. We love seeing your version! You can also post your pictures to our facebook page!


Jean
This is my favorite sourdough bread recipe! Adding honey to it is genius. It runs out perfect every time. Thank you!!
Jean
**TURNS out perfectly 😉